
Job Submission Feature Tour
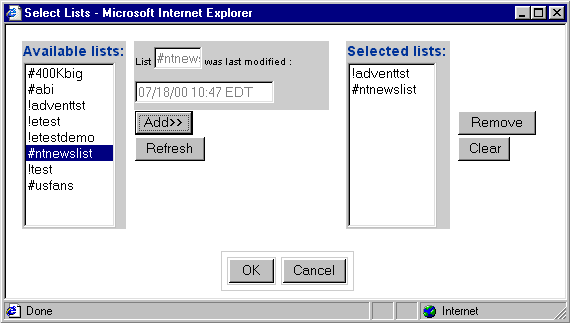
Work in the List Selector window as follows:
- Select a list, then click Add. The list name is copied to the column on the right.
- Continue this process until the names of all the lists you wish to use are copied on the right. (Select a list on the right and click Remove if you need to remove a list from the right column.)
- When you finish selecting lists, click OK.
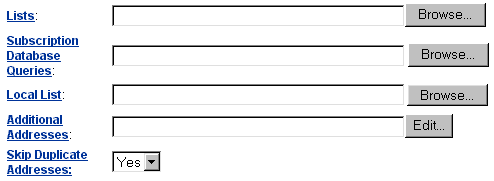
The selected list names, each separated by a comma, are now displayed in the List field on the form.
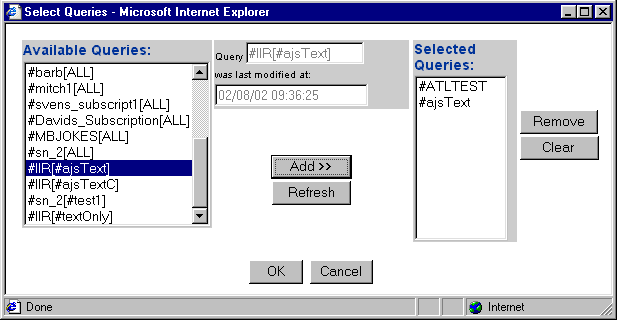
Work in the Query Selector window as follows:
- Select a query, then click Add. The query name is copied to the column on the right.
- Continue this process until the names of all the lists you wish to use are copied on the right. (Select a query on the right and click Remove if you need to remove a query from the right column.)
- When you finish selecting lists, click OK.
The selected query names, each separated by a comma, are now displayed in the Subscription Database Queries field on the form.
Click Browse (located to the right of the Local Lists field) to locate and select the file.
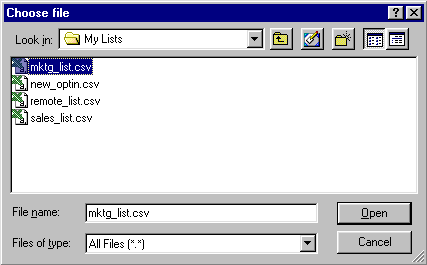
After you make a selection and click Open, the list path is displayed on the messageREACH form.
Note: that you can not use inserts or passwords with additional addresses.
Click Edit (located to the right of the Additional Addresses field).
Work in the Edit Address window by following these steps:
- Type each address, one at a time, in the upper field. Click Add after typing each address, and the address is moved to the lower field. (Click Clear if you wish to clear all addresses from the lower field and start again; you can also select an address in the lower field and click Remove to delete it.)
- When the lower field displays all the individual addresses to which you want to send your message, click OK.
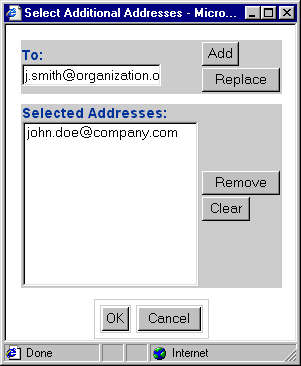
The addresses are transferred to the Additional Addresses field on the form.
- Select "Yes" if you wish the message to be sent only once per recipient, even if the recipient's email address appears multiple times in the address list(s).
- Select "No" if you wish the recipients to receive the message as many times as their email address appear on the address list(s).


